Setup and Configuration of TP-Link N300 Router for a Wireless Subnet on Existing Network
Plug in and power on the router.
Connect the TP-Link via the WAN port to an available LAN port on your ISP’s router. Then use the setup wizard to configure your TP-Link as a ‘Wireless Router’.
Connect your computer to the router (wired or wireless)
Wired
Turn off the WIFI on your computer and connect it to the router via an Ethernet cable.
Wireless
Find the product label at the bottom of the router. Use the default network name (SSID) and password to join the network.
Launch a web browser and enter http://tplinkwifi.net or http://192.168.0.1 in the address bar. Create a password to log in.
Click Next to start the Quick Setup. Select Wireless Router and follow the step-by-step instructions to set up the internet connection.
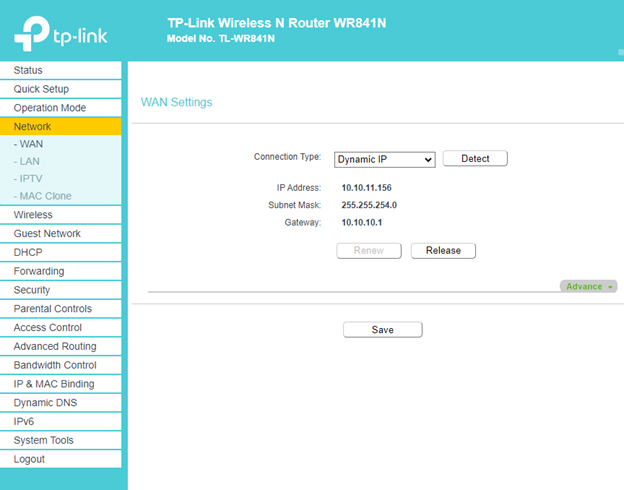
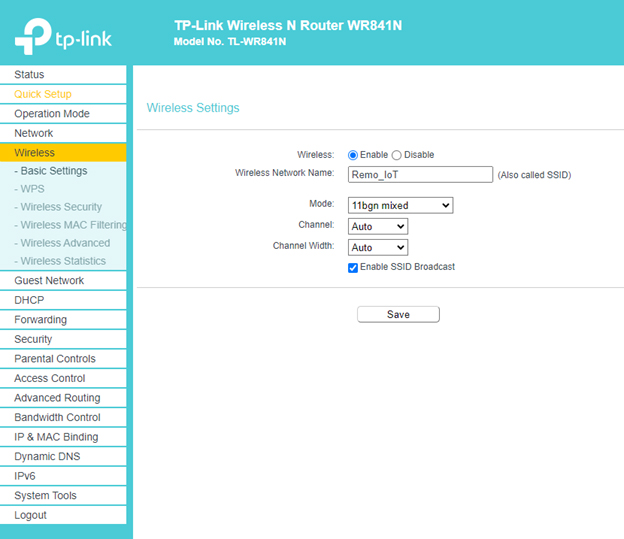
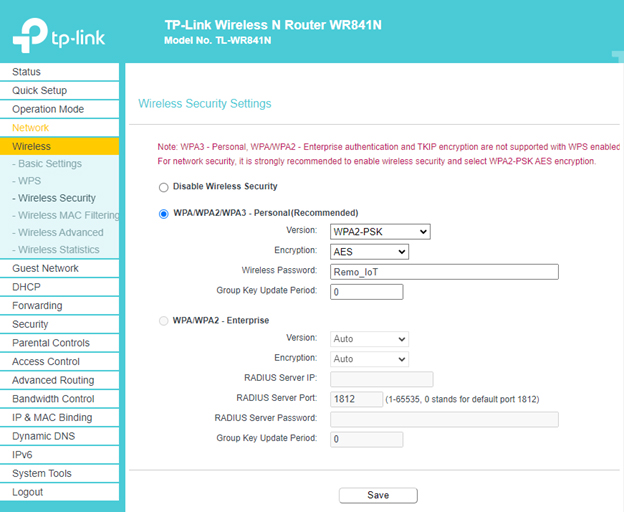
The following screenshots will show which screens you’ll need to customize. Be sure to save your changes on each page you edit.
Use the network name and password of your choice and write them down.
Once you rename the network, you’ll have to log in to that network using the credentials you just assigned to it on your computer to continue the configuration.
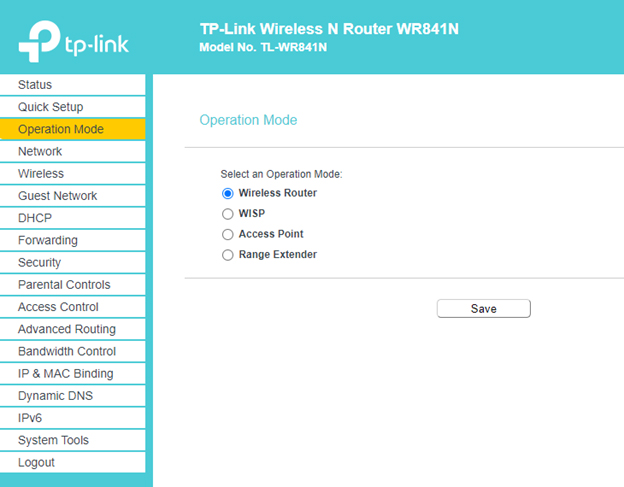
OPERATION MODE
NETWORK – WAN
WIRELESS – BASIC SETTINGS
WIRELESS – WIRELESS SECURITY
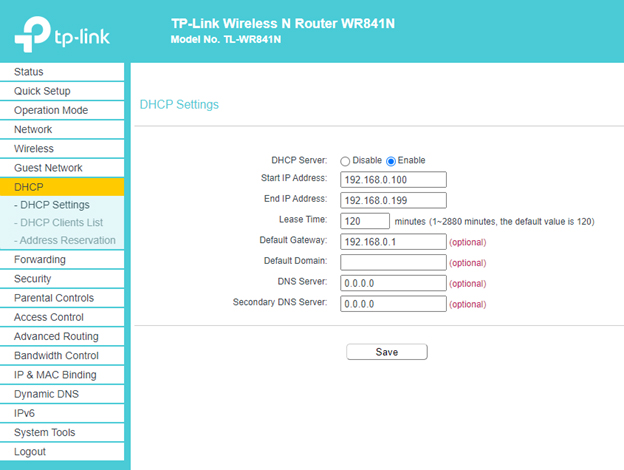
DHCP – DHCP SETTINGS
