Reset & Register DoorCam 3
*** VERY IMPORTANT *** Please put your phone in airplane mode and verify that your Wi-Fi setting is turned on and that you are connected to your 2.4 GHz network before you begin. Using airplane mode prevents the phone from connecting to the cell tower during setup.
Please remember to take your phone off of airplane mode when you are finished!
Reset the device – use a pen or a slim tool to press and hold the reset button on the back of the device for 5 – 10 seconds. When you hear the audio cue “QR code detecting”, you have successfully reset the device. Please don’t proceed with the setup until you hear the device say ‘QR code detecting”.
Remove the device – If this is not the first time you’ve registered the device, you must remove it from the app before re-registering it. Login to the Remo+ app and tap on the ‘Account’ icon at the bottom of the home screen, then tap on the third menu item ‘Information’, then tap on the image of the device you are removing in the ‘Your Devices’ list, then tap ‘Remove’ and confirm twice
Add the device – Login to the Remo+ app, tap on the “+” at the top, right-hand corner of the home screen, select the device you wish to add, and then select your time zone.
Use the camera on your phone to scan the QR code for product registration. 
You will then be asked to enter the password for your 2.4 GHz network.
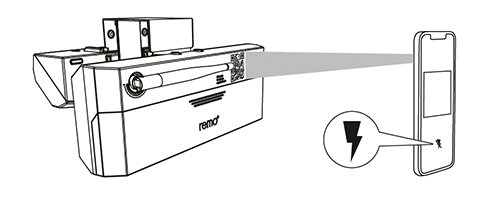
Then you will be asked to allow the DoorCam 3 to scan the QR code that appears on the screen of your phone. Place your phone about 5 inches in front of the camera lens and press “HEARD” after you hear the audio cue “QR Code scanned”. Your app will then complete the registration. This may take up to 3 minutes.
Please remember to take your phone off of airplane mode when you are finished!
DC3, DoorCam3, Three, Setup, Install, Connect, Registration, Reregister